Worlds Knowledge in Your Pocket.
"Share your knowledge. It is a way to achieve immortality." by Dalai Lama
Worlds Knowledge in Your Pocket.
"Share your knowledge. It is a way to achieve immortality." by Dalai Lama

You may take screen capture to save what’s on your iPhone screen. When capturing a sequence of events is crucial. However, a screen recording video is the best alternative. Fortunately, it’s simple to record the screen on your iPhone 12, 12 Mini, 12 Pro, or 12 Pro Max.
There are a few different ways that you can record your iPhone 12 Pro Max’s screen. In this article, we’ll show you how to use the built-in Screen Recording tool, as well as a third-party app.
A screen recording is a digital copy of everything that appears on your iPhone’s display. This can be useful for demonstrating how to use an app, showing off a high score, or sharing a funny conversation. Screen recordings are saved as video files, so you can watch them later or share them with others.
There are two ways that you can record your screen:
The built-in Screen Recording tool is a quick and easy way to record your screen. It’s located in the Control Center, which you can access by swiping down from the top-right corner of your iPhone 12 Pro Max’s display. We’ll show you how to enable built-in screen recording on your iPhone 12 in this section.
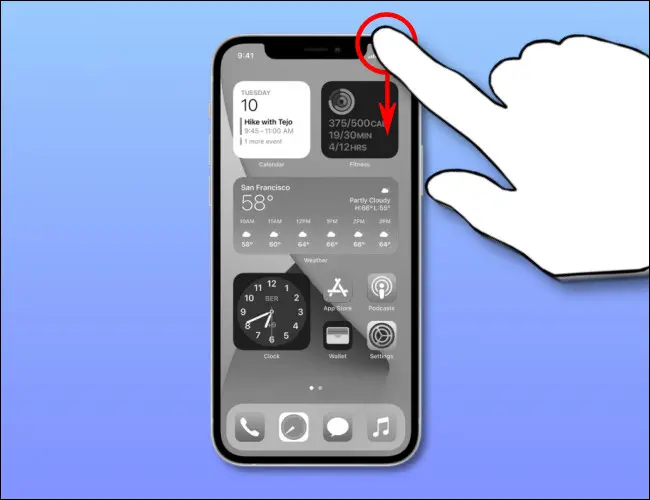
On your iPhone, enabling Screen Recording requires turning on a specific “Screen Recording” button in Control Center. (If you recall, swiping down from the battery icon in the upper-right corner of the screen will bring up Control Center.)
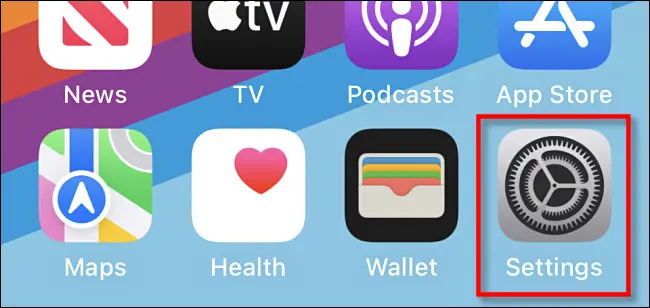
The Screen Recording button is turned off by default. To turn it on, go to “Settings.”
In Settings, select “Control Center.”

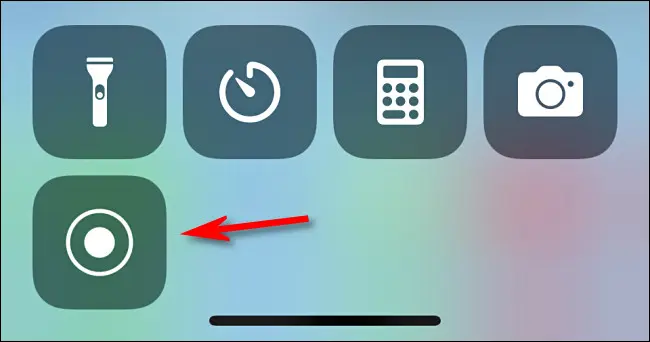
In the Control Center, tap the downward-facing arrow until you see a list with the word “More Controls.” Tap “Screen Recording” (with a plus sign beside it).
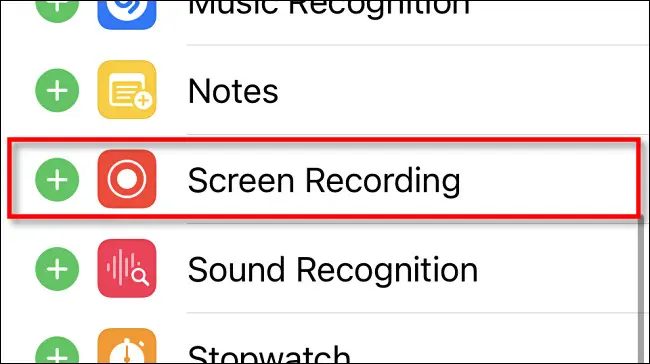
When you go to Control Center and tap on the “More” option, you’ll see “Screen Recording” in the “Included Controls” list above. You can rearrange shortcut buttons by dragging them into the desired order when Control Center opens. When you’re finished arranging, exit the Settings app — it’s time to record!
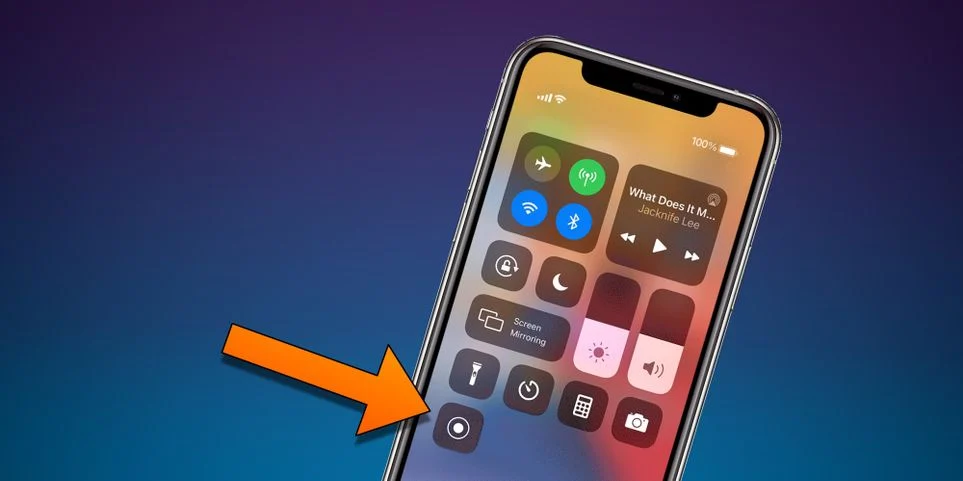
You may record a video using the following steps: Add the Screen Recording option to Control Center (see section above). To begin, open Control Center by swiping down with one finger from the upper-right corner of the screen near the battery icon.
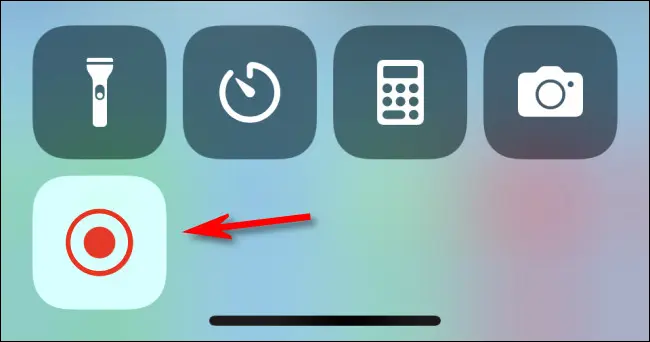
To record a screencast, go to Control Center and select Screen Recording (a circle within another circle). Simply press and hold the Screen Recording button to record without audio. If you want to capture audio from your microphone while taking a screen recording, press and hold the Screen Recording button.
You’ll see a different pop-up screen if you tap and hold the Screen Recording button. Tap the microphone symbol, then choose “Start Recording” if you want to record audio from your microphone.
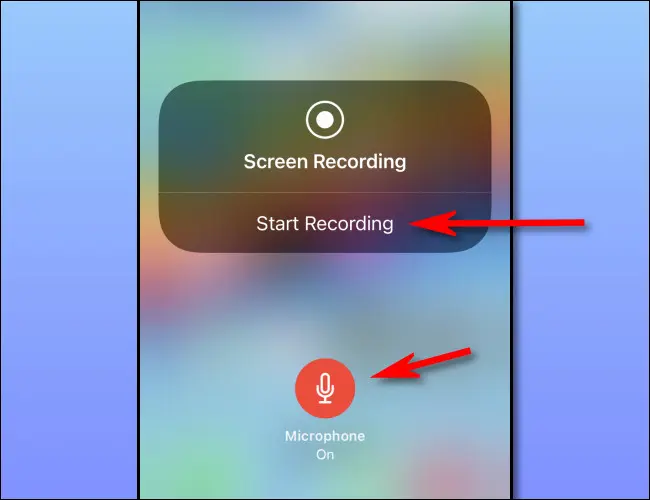
Your iPhone 12 will begin recording after a three-second countdown. The clock in the upper-left corner of the home screen will turn red, and the Screen Recording option in Control Center will likewise become red. If you turn on the microphone, your voice will be recorded as well.
You can stop a screen recording in one of two ways. Tap the red clock in the upper-left corner of the screen, then choose “Stop” from the drop-down list that appears.
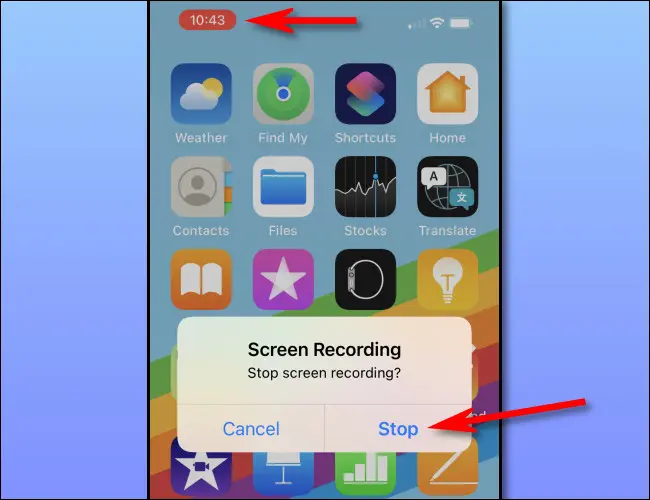
Alternatively, go to Control Center and tap the red Screen Recording button. A pop-up window will appear; select “Stop” to finish the recording.
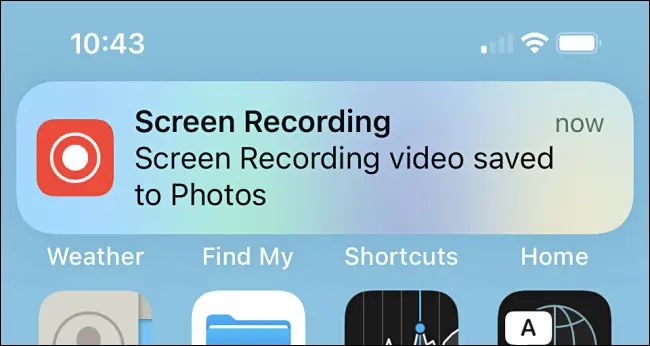
When you’re done, the screen recording will stop, and you’ll see a notice that says “Screen Recording video saved to Photos,” which means the captured screen recording video is now in your regular Photos library.
Open the Photos app and go to your screenshot. Tap the screen recording video thumbnail so that it becomes larger, then tap Edit. If you just want to trim out the beginning or end of a video, use the built-in edit tools in the Photos app to do so. Have fun!
Also Read More: How To Optimize Your Social Media Profiles
As we mentioned earlier, there are a few different ways to record your screen on an iPhone. One of the best (and most popular) is using the QuickTime Player app that comes pre-installed on every Mac. Here’s how:
Connect your iPhone to your Mac using a Lightning cable.
Open the QuickTime Player app on your Mac. If you can’t find it, open Spotlight Search (Command+Space) and type “QuickTime Player” to launch it.
In QuickTime Player, click “File” from the menu bar, then choose “New Movie Recording.“
A new window will open, showing your Mac’s webcam feed. Look for the small arrow next to the record button and click it.
From the drop-down menu, choose your iPhone as the camera input. You should now see your iPhone’s screen in the QuickTime Player window.
To record audio from your iPhone’s microphone, click the small arrow next to the record button again and choose “Built-in Microphone” as the audio input.
When you’re ready to start recording, click the record button (the big red circle). QuickTime Player will count down from 3 and then start recording your iPhone’s screen.
To stop recording, click the stop button (the square in the middle of the record button).
QuickTime Player will save your screen recording to your Mac’s “Movies” folder by default. You can change where recordings are saved by clicking “File“> “New Movie Recording” and then clicking the small arrow next to the record button. Choose “Movie Settings…”
In the new window that appears, click the “Options” tab. From here, you can choose where QuickTime Player saves your recordings and what kind of compression is used. When you’re finished, click “OK.”
To watch your recording, open the QuickTime Player app and go to “File“> “Open Movie in New Player.” From here, navigate to where you saved your recording and double-click it to play it back.
You can also use third-party screen recording apps from the App Store, such as ScreenFlow or Reflector 3. These apps offer more features than QuickTime Player, such as the ability to record audio from your Mac’s microphone or add annotations while you record.